LING YUAN MING
ARCHITECTURE E-PORTFOLIO
Computer Application
(ARC 2723/CSC60503)
Project 1
Modelling of an Architectural Design
Introduction
The first project involves completion of basic form and external model of a selected architectural design. Ability to complete 3D model will reflect the knowledge of using the software to create 3D geometries. 3D models are assessed on the overall detail, complexity and creativity used in the creation and development process.
The objectives of this project are as follow:
1. Understand and execute the functions of Standard Primitives, Splines & Modifiers
2. Understand and utilise polygon modelling and NURBS modelling in producing the 3D models
3. Learning Outcomes of this Project
4. To produce 3D model of a selected architectural design using 3DS Max/Rhinoceros or both
5. To record Work in Progress (WIP) as progressive evidence of the working process


WIP
RENDERINGS


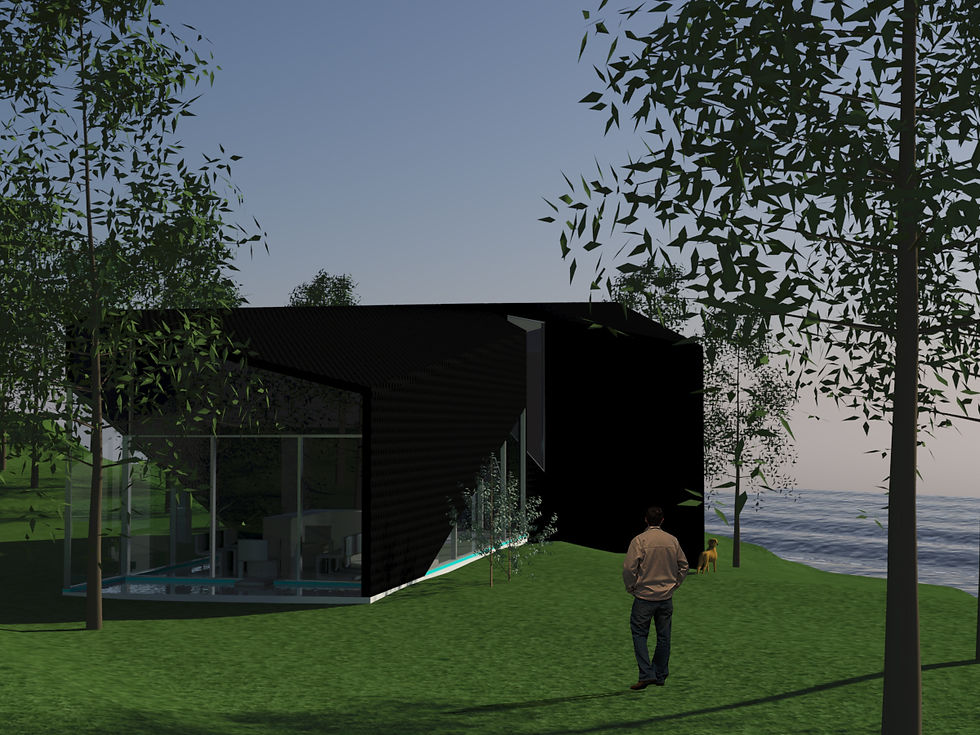
The building I have chosen is the Scape House by Andrew Simpson Architects. This house is situated in Australia. The very well-played of different height and shapes of geometry make it challenging.
Introduction
The second project involves the production of photorealistic still rendering of the selected architecture design with materials, appropriate camera views and post-production enhancement on the visual outcome. The visualisation work would be assessed on the types and ways materials are used, types of lights and effects used to set up the scene, setup of appropriate camera views for rendering and skills of using post-production tools to enhance the visual outcome.
The objectives of this project are as follow
1. Able to import .dwg file into 3DS Max
2. To manage the 3D scene using layers
3. To create materials for 3D objects
4. To use lights in 3DS Max for exterior and interior rendering
5. To set up good photographic compositions using cameras in 3DS Max for final rendering
6. To understand and execute the appropriate rendering settings
7. To enhance the visual outcome of the renderings using post-production tools
Project 2
Still Rendering with Materials, Light, Camera Views with Site Context
 PS1.jpg |  PS2.jpg |  PS3.jpg |
|---|---|---|
 PS4.jpg |  PS5.jpg |  PS6.jpg |
 PS7.jpg |  PS8.jpg |  PS9.jpg |
 PS10.jpg |  PS11.jpg |  PS12.jpg |
 PS13.jpg |  PS14.jpg |  PS15.jpg |
 PS16.jpg |  PS17.jpg |  PS18.jpg |
 PS19.jpg |  PS20.jpg |  PS21.jpg |
 PS22.jpg |  PS23.jpg |  PS24.jpg |
 PS25.jpg |  PS26.jpg |  PS27.jpg |
 PS30.jpg |  PS31.jpg |  PS32.jpg |
 PS1 |  PS2 |  PS3 |
|---|---|---|
 PS4 |  PS5 |  PS6 |
 PS7 |  PS8 |  PS9 |
 PS10 |  PS11 |  PS12 |
 PS13 |  PS14 |
RENDERINGS
WIP

Final rendering of the first eye level perspective in daylight.

Final rendering of the second eye level perspective at dusk.


The entire process of exterior rendering taught me a lot on using 3D programes for material application, rendering and also Photoshop for post production editing.


Project 2a
WIP
Project 2b
RENDERINGS

The dining and kitchen hall

Living room where family hangout
 Apply Interior Wall Material |  Sky Portal |  Decorations |
|---|---|---|
 Plants and Kitchenware |  Curtains |  Light fixtures |
 Additional furniture |  Floor Mats |  Overall view of interior rendering |
RENDERINGS
WIP
Introduction
This project involves production of a maximum 90 seconds animation of the completed 3D scene using 3DS Max’s animation commands and tools. It also involves simple video editing work such as stitching video clips, background music & special effects editing, through the use of Windows Movie Maker, iMovie, Adobe Premiere and After Affects.
The objectives of this project are as follow:
1. To continue from Project 2, the completed scene is animated.
2. To set up camera paths for animation rendering.
3. To allow students to explore their imagination, inventiveness and story telling abilities when creating the animation.
Project 3
A maximum 90 seconds Animation of the Completed 3D Scene
 PS1.jpg |  PS2.jpg |  PS3.jpg |
|---|---|---|
 PS4.jpg |  PS5.jpg |  PS6.jpg |
 PS7.jpg |  PS8.jpg |  PS9.jpg |
 PS10.jpg |  PS11.jpg |  PS12.jpg |
 PS13.jpg |  PS14.jpg |  PS15.jpg |
 PS16.jpg |
FINAL VIDEO
Please do watch the video in highest resolution for best results.


